How does precision grinding ensure the flatness and parallelism of the ceramic base meet the requirements for eutectic chip bonding?
Release Time : 2025-09-16
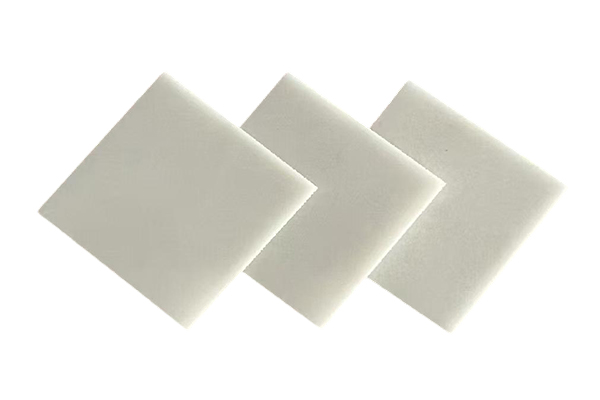
In the packaging process of high-power semiconductor devices, IGBT modules, or RF chips, the ceramic base, as the core structural component supporting the chip, has a surface geometry that directly determines thermal conductivity, electrical connection reliability, and long-term service stability. In particular, the chip eutectic bonding process requires uniform bonding over a large area between the substrate and the chip backside. Any slight deviation in flatness or non-parallelism between the two surfaces can lead to uneven solder layer thickness, local voids, or even cold solder joints. These microscopic defects can cause hotspot concentration, thermal stress cracking, or interfacial delamination during power-on operation, ultimately leading to device failure. Therefore, precision grinding is not only a dimensional processing method but also a key guarantee for achieving "zero-gap" connections.
Although ceramic materials exhibit excellent heat resistance and insulation properties after sintering, their surfaces inevitably exhibit undulations and deformations. This raw state is far from meeting micron-level assembly requirements. Precision grinding uses a controlled mechanical removal process to gradually correct the surface topography, transforming macroscopic errors into microscopic flatness. The core of this process lies in establishing a stable machining system that ensures highly predictable and undisturbed relative motion between the grinding wheel, workpiece, and fixture. The grinding equipment utilizes a high-rigidity spindle and precision guideways to ensure smooth grinding wheel rotation with minimal vibration. Furthermore, the worktable undergoes multiple scraping or laser calibration to ensure linearity and levelness, avoiding the introduction of additional errors.
The clamping method is a critical factor influencing final accuracy. Ceramics are highly brittle, and uneven clamping force or localized overload can cause elastic deformation or microcracks in the workpiece. Ideally, vacuum suction or a flexible support array should be used to evenly distribute force across the entire workpiece bottom surface, avoiding warping caused by overhanging edges or point contact. For thin ceramic sheets, droop caused by their own weight must also be considered and compensated for in the grinding path planning.
The grinding process itself follows a progressive logic, from coarse to fine. Initially, a coarser-grit diamond grinding wheel is used to quickly remove excess material and eliminate large irregularities. Subsequently, a finer-grit grinding wheel is gradually adopted to reduce surface roughness and minimize scratch depth. Online measurement or offline inspection is performed after each process, providing real-time feedback on error distribution and guiding the dressing strategy for the next stage. Modern processes often incorporate computer-controlled trajectory compensation technology to selectively grind specific areas, achieving "on-demand material removal" rather than uniform global cutting.
Grinding wheel dressing is also crucial. With use, the diamond grains on the grinding wheel surface become dull or fall off, resulting in reduced cutting force and deteriorating surface quality. Regularly reshaping and sharpening the grinding wheel with a dressing pen restores its contour accuracy and sharpness, ensuring consistent material removal every time it contacts the workpiece. Coolant not only reduces temperature but also provides chip removal and lubrication, preventing abrasive grains from embedding in the surface and causing secondary scratches.
Final flatness and parallelism are the result of a coordinated system. After grinding, polishing is typically required to further reduce surface roughness and improve wettability with the chip. The entire process relies on strict environmental control: a constant temperature workshop minimizes the effects of thermal expansion and contraction, and a cleanroom prevents dust from contaminating the surface. Every piece of ceramic base undergoes multi-dimensional inspection before leaving the factory, including flatness measurement with a laser interferometer, parallelism verification with a height gauge, and microtexture analysis with a white-light interferometer.
When a piece of ceramic base is placed under a microscope, its surface appears mirror-smooth and uniform. This is not only the end of the process, but also the beginning of reliability. It means that the chip can be attached without hindrance, the solder can be evenly spread, and heat can be smoothly conducted. On this near-perfect surface, every flow of current is silently supported, and every watt of heat is dissipated in an orderly manner. Precision grinding, with every millimeter's difference, safeguards the trust within the micron.


